This past month our in-house iLoveToCreate designers participated in a fun DIY shorts challenge. All our designers picked up shorts from Target in the color and style of their choice. From there, everyone was allowed to use their favorite Aleene's and Tulip products from iLoveToCreate. Everyone came up with something totally all their own! Check out the designs and click on the links below each to find the full tutorial for each!
Read more »
Showing posts with label DIY shorts. Show all posts
Wednesday, July 31, 2013
Tuesday, July 30, 2013
Grumpy Cat Shorts DIY
Grumpy Cat really cracks me up, so for the iLoveToCreate designer shorts challenge, I took Grumpy Cat to the next level on a pair of shorts. I've created Grumpy Cat on a shirt and on a ceramic necklace, but I thought it would be really funny to "grumpify" a pair of shorts. Here's what I did...
Read more »
Friday, July 19, 2013
Leather & Studs Shorts DIY
As a part of our DIY shorts challenge in our design studio, I wanted to use my favorite Aleene's glues to make some shorts that had a little edge to them! I've been addicted to studs and spikes as of late...I did add spikes all over my iPhone after all! When paired with some faux leather, studs immediately give off a rocker vibe that I just love to pieces. So why not rebel against the plain Jane shorts everyone else is wearing and make your own pair...here's how!
Monday, July 15, 2013
DIY Nautical Sailor Shorts & Belt DIY
We always have something new and exciting going on here at iLoveToCreate and instead of coordinating the craft designer projects and schedules like I normally do, I got to be the designer for a day! The entire design studio was challenged to create a pair of DIY shorts and I got to join in! Since I love all things nautical..anchors, lobsters, ropes, seahorses, etc., I knew I wanted to add that flair to my shorts! Here's how you can unleash your inner Gilligan and make your own sea-worthy pair along with a super easy-to-make rope & ribbon belt!
Read more »
Friday, July 12, 2013
Typography Denim Shorts DIY Tutorial
Over the next few weeks, we plan on sharing with you some fun DIY shorts designs that our design team and creative folks here at iLoveToCreate came up with on the fly. Our whole team had so much fun dreaming up ways to create some wildly cool shorts and each of us went for a totally different look. I was going for a super fun distressed typography look for mine, since I'm part graphic designer in my social media job :) I'm a super messy designer by nature, so if I can do them, you can too!!
Read more »
Saturday, June 22, 2013
Glittered & Dyed Shorts
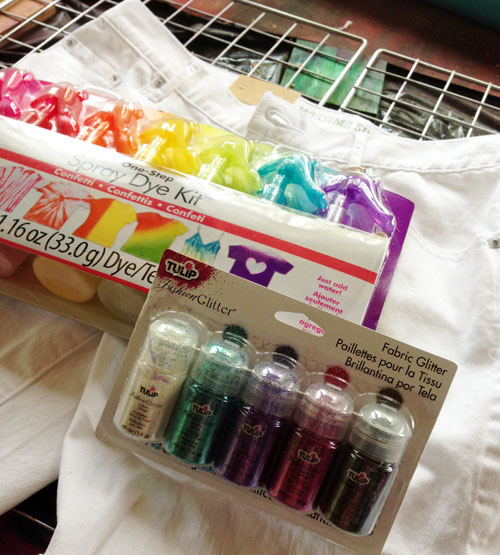
Sometimes I get in moods where I just want to cover everything in glitter. If not covered, then at least trimmed, right? When I dyed these shorts, I felt like they needed some pop - more "wow" - hello, glitter! I know you're thinking - will the glitter wash off? I used Tulip Glitter Bond as my glue. I'm sure it will fade after a few washings, but all you have to do is touch it up and you are good to go, these shorts will always look as good as new!
SUPPLIES:
Paint brush
Cotton shorts
Pant hanger with clips
Hose with spray nozzle
1. Wash your shorts, leave them damp. Add water to the dye bottle and shake. Set the shorts on a plastic tablecloth and spray at the bottom.
2. Well, I changed my plan. I decided instead of spraying the shorts, I wanted them to look dipped. Therefore I switched out the top of the bottle to a tip instead of the sprayer. I hung up the shorts using a pant hanger and dripped the the dye in an even row along the shorts. This gives it the dipped look. Drip, dip, it's all the same, right?
3. Let them set for six hours, then use the sprayer to remove the excess dye. This will prevent the dye from getting on the white part of the shorts. Spray until the water runs clear. Put on the plastic gloves that come with the dye and squeeze out the water and any remaining excess dye. NOW you can wash them in the washer on cold.
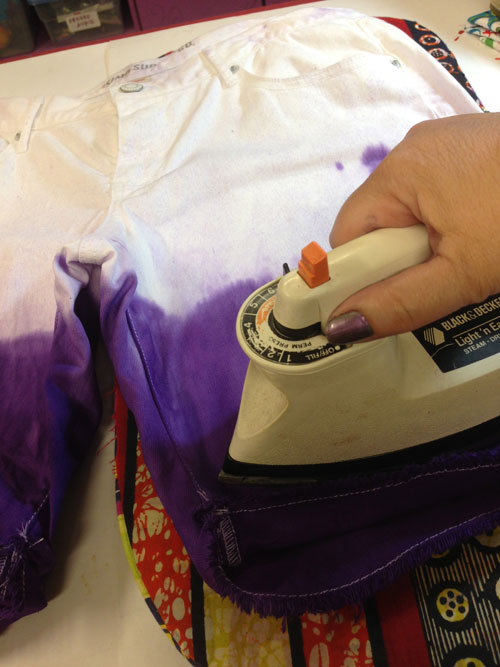
4. After they are dry, iron them and create a crease at the bottom of each leg. This will give you a nice, crisp guideline to add the glitter!
5. Paint on a juicy layer of Tulip Glitter Bond and then pour on the glitter! Tap off excess. Do this for the front and back of each cuff. You can also do the belt loops too!
Let dry for an hour.
And here you go - ready-to-wear! To wash, turn inside out and wash in cold water. Hang dry. If your glitter fades after a couple washings, simply repeat the glittering process!
Subscribe to:
Posts (Atom)