Showing posts with label crafty chica. Show all posts
Friday, August 16, 2013
HIKING DIY: Silkscreen Bandanas & Shirts
This Sunday I leave on a venture I never imagined: I'm going to spend a weekend at Glen Canyon National Park (Lake Powell). I'm not at all an outdoor kind of chica, but some blogging friends of mine entered a contest to win this trip - we called ourselves The Latina Blogstars, we wrote an essay - and we won one of the spots! You can read all about it here on my blog! Every time I get nervous for a big project or event - I craft it out, that's the only way I can relax and chill my vibe. So in this case, I decided to silkscreen T-shirts and bandanas for our team members!
This is a great idea for family camping trips, hiking excursions with friends, even vacations or parties. And it's super easy, I'll show you how I got this look.
Read more »
Friday, August 9, 2013
Make Your Own Rainbow Yarn
I love to crochet and I love to use 100% cotton yarn, but it was hard to find vibrant rainbow skiens in the colors I wanted (ie: BRIGHT). So I came up with a method to this DIY rainbow yarn project. It's really easy,I hope you give it a try!
Read more »
Friday, August 2, 2013
Make your own rolling stamp
The best art is oftentimes the one without any rules, that's why this technique using a lint roller as a rolling stamp is so cool! It's fun and experimental and you can great for creating abstract backgrounds for your mixed media and fabric paint projects! Kathy a.k.a. Crafty Chica introduced me to this technique through her Quick Tips video she did below. The most awesome thing about this creative stamp is that you can a wide variety of stamps for under $2...what a score!

and

Read more »

and

Friday, July 12, 2013
Glittered Tie-Dye Totes
Last month I helped run a booth for the Tie-Dye Your summer campaign and we had leftover totes. These weren't normal boring totes, they were really nice ones - fully lined with a big roomy area for decorating. I knew I wanted to dye them, but to give them even more personality, I added some glittered elements! Here is a video I made showing the process! It was really fun!
Read more »
Friday, July 5, 2013
Popcorn Tie-Dye Technique
OK, I didn't actually use popcorn in the making of this shirt, but you'll see in my video why I called it that name. It's a traditional technique from Japan, but I gave it my own rubberband twist! It's easy and the final look is spotty and fun!
You'll need a pre-washed T-shirt and lots of ruberbands - and most of all just one bottle of Tulip One-Step Dye. I used black.


Friday, June 28, 2013
Glue-Resist Altered T-shirt
I've been working on a tie-dye series for the second summer now and my assignment is to come up with a fun way to use dye. I don't know what was wrong with me this week, but my creativity well dried up! I happened to be texting with fellow iLTC blogger, Margot Potter of DIYDoyenne.com, and mentioned in passing about my frustration. She sent me a text of one sentence that changed the course of my attitude:

"Try a faux batik look!"
I've already used a bleach pen and had to whip something different. Then I remembered how my other crafty friend, Denise from Pearmama.com, likes to use clear glue for a faux batik look. Within seconds, my juices were bubbling and I got to work. I absolutely love how the end result worked!
It sure helps to have crafty friends!
What you need:– Aleene's® Clear Gel Tacky Glue™– Freezer paper, iron
– Pre-washed T-shirt
– Tulip® One-Step Spray Dye Kit™
– Pre-washed T-shirt
– Tulip® One-Step Spray Dye Kit™
See my video below to see the directions!
Saturday, June 22, 2013
Glittered & Dyed Shorts
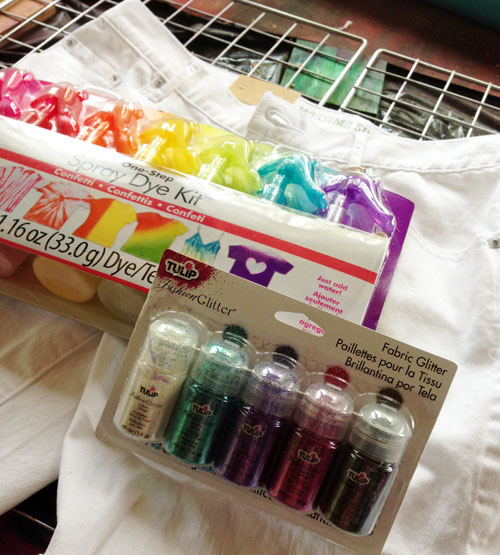
Sometimes I get in moods where I just want to cover everything in glitter. If not covered, then at least trimmed, right? When I dyed these shorts, I felt like they needed some pop - more "wow" - hello, glitter! I know you're thinking - will the glitter wash off? I used Tulip Glitter Bond as my glue. I'm sure it will fade after a few washings, but all you have to do is touch it up and you are good to go, these shorts will always look as good as new!
SUPPLIES:
Paint brush
Cotton shorts
Pant hanger with clips
Hose with spray nozzle
1. Wash your shorts, leave them damp. Add water to the dye bottle and shake. Set the shorts on a plastic tablecloth and spray at the bottom.
2. Well, I changed my plan. I decided instead of spraying the shorts, I wanted them to look dipped. Therefore I switched out the top of the bottle to a tip instead of the sprayer. I hung up the shorts using a pant hanger and dripped the the dye in an even row along the shorts. This gives it the dipped look. Drip, dip, it's all the same, right?
3. Let them set for six hours, then use the sprayer to remove the excess dye. This will prevent the dye from getting on the white part of the shorts. Spray until the water runs clear. Put on the plastic gloves that come with the dye and squeeze out the water and any remaining excess dye. NOW you can wash them in the washer on cold.
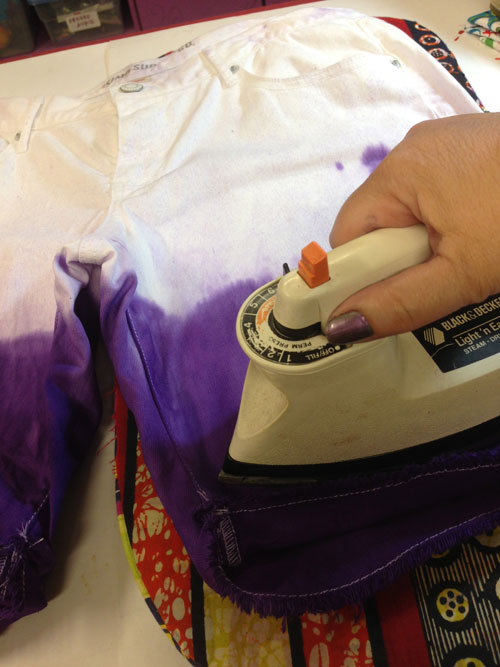
4. After they are dry, iron them and create a crease at the bottom of each leg. This will give you a nice, crisp guideline to add the glitter!
5. Paint on a juicy layer of Tulip Glitter Bond and then pour on the glitter! Tap off excess. Do this for the front and back of each cuff. You can also do the belt loops too!
Let dry for an hour.
And here you go - ready-to-wear! To wash, turn inside out and wash in cold water. Hang dry. If your glitter fades after a couple washings, simply repeat the glittering process!
Friday, June 14, 2013
Holographic Dyed Tank (Made from a White T-shirt!)
What happens when you need a black T-shirt, but can't find one? You dye a white shirt! That's what I did and then I added some shiny squares for the wow factor! Here's how you can you can make one too!
What you need:
– White cotton T-shirt.
– Scissors.
– Chalk
Here's a video tutorial I made!
Friday, June 7, 2013
Shibori Summer Sheets!
Summer is here and my bedroom needed a makeover! I've been doing a new tie-dye video every week and now it was time to give my bed some rainbow love!
Here is what you need:
PVC pipe, about 24" long
Rubberbands and twine or string
Scissors
Scissors
Here is my video on how to tie-dye your sheets! My suggestion is to get at least 6-8 bottles ofr a queen set, that's what I did. I LOVE how my sheets turned out. I decided at the last minute to use some Tulip® Fabric Spray Paint™ and add stenciled designs...
LINK
Friday, May 24, 2013
Doodle on Your Tie-Dye!
iLoveToCreate has kicked off its annual Tie Dye Your Summer campaign, which means there is tie-dye everywhere in my house. Why? Well, last year I did a really fun series about non-traditional tie-dye methods and it went so well, I was asked to do it again.
Granted, I used up a lot of ideas last year, so I'm working hard at finding new ways to play with the colors. Here his my first one of the summer - doodling on tie dye! Take a look at video, I hope it inspires you!
LINK
Granted, I used up a lot of ideas last year, so I'm working hard at finding new ways to play with the colors. Here his my first one of the summer - doodling on tie dye! Take a look at video, I hope it inspires you!
LINK
Subscribe to:
Posts (Atom)