Tuesday, June 11, 2013

No Sew Embellishing

Embellishing clothing is such a fun way to personalize things.  However, even if you don't sew there are still lots of ways to embellish clothing.  All of Aleene's adhesives can help you get that hand-sewn look without even picking up a needle and thread.

Here are a couple of ways I embellished some onesies without sewing.  For the first onesie (pictured above) I got out some lace and Aleene's Fabric Fusion.
I ran a line of fabric fusion down the sleeve and another line parallel to it since my lace was fairly wide.  I pressed on the lace, allowed it to dry well, and it was done.
While I did sew to make the hat, I actually used fabric fusion on the hat as well so that the petals on the flower wouldn't flop around or fall downward.
On another onesie I pulled out some leather I had, a Tulip fabric marker, and Aleene's Peel and Stick Sheets.
I cut a small heart out of the leather and used my Tulip fabric marker to create stitch marks.
I traced the heart onto the peel and stick sheet to cut the adhesive the same size as the heart.  
Then I peeled off the backing and pressed the heart onto the shirt.  Done.
You could even add a name right below the heart with the fabric marker for a personalized look.
So what will you embellish next?

Monday, June 10, 2013

Make your own Tie-Dye Umbrellas

Tie dye is very versatile. Not only is it great on 100% natural fibers, but it also works great on paper!  We tried our Tulip One-Step Tie-Dye out on some simple paper umbrellas made from rice paper we ordered online.  The colors turned out so vibrant and they popped at our tie dye baby shower. Here's the simple steps for making these pretty parasols!

What you need:  
– one bottle of Tulip One-Step Tie-Dye mixed up in plastic tub
– large paintbrush from hardware store
– 1 32" paper parasol (you can find these at Luna Bazaar online)
Lay out your parasol on a table. It's best if you can fit the handle down in a groove so that the parasol is as flat as it possibly can be.
 Dip your paintbrush in the dye mixture. Starting from bottom, sweep your bristles up about 4 to 5 inches.  This will allow your dye to create the dry brush look shown.
Continue sweeping around your umbrella, making sure to apply an even coat all around.  Let dry completely!
 We placed our parasols on our fruit and drink tables...
...as you can tell, we used lime, turquoise, yellow, and fuchsia Tulip One-Step Tie-Dyes for our color palette.
We also put them up above!
They turned out so colorful and fun!
Here's our guests of honor Michelle and Lauren in front of the parasols and our diaper cake on display!

These parasols not only are perfect for a shower, they'd be perfect for a wedding too!

Check back all this week as we share more fun projects from our Tulip® Tie Dye Baby Shower!

Altered Chevron No-Sew T-shirt


Here's a cool shirt perfect for a summer picnic or evening out!  And it's entirely no-sew and so easy to make. Here's how you do it!
What you need:
– T-shirt (this shirts ia a Men's Large Hanes)
– Scissors
– Tape
Lay your shirt out and mark a diagonal line from under the arm to the top of the opposite shoulder.
Cut on the line.

Cut the shirt on the shoulder down about 12 inches.

Cut open and tie a bow from the fabric left of the cut.
Now cut off the top of the sleeve.
Cut two lines on the sleeve.
Cut them open.

Tie Them.

Take your paint and put it on a paper plate.

Tape off your shirt in a chevron pattern.

Put a piece of cardboard between your shirt.
 
Paint your shirt with the pouncer

Let dry about 3 hours, then remove the tape.
Here's  how the bows look on the side.
When you wash this shirt, wash in cold and hang dry.
A fun, summer, no-sew t-shirt.

Have a wonderful Monday.

Lots of love,
Anne

See more of my tutorials at my Wobisobi blog!

Friday, June 7, 2013

Shibori Summer Sheets!

Summer is here and my bedroom needed a makeover! I've been doing a new tie-dye video every week and now it was time to give my bed some rainbow love!

Here is what you need:
PVC pipe, about 24" long
Rubberbands and twine or string
Scissors

Here is my video on how to tie-dye your sheets! My suggestion is to get at least 6-8 bottles ofr a queen set, that's what I did. I LOVE how my sheets turned out. I decided at the last minute to use some Tulip® Fabric Spray Paint™ and add stenciled designs...


LINK

Tie Dye T-shirt Pom Pom Balls

Pom Poms are such a classic craft that never get old!  We've been seeing lots of fun yarn pom poms and soft t-shirt pom poms, so we wanted to try our hand at tie dye pom poms using shirts created with Tulip One-Step Tie-Dye!  We created these pretty pom poms for a special baby diaper cake tutorial we plan on sharing with you next week!  These made the perfect little adornment!

What you need:– Tie dye shirts created with the 5-pack Tulip One-Step Tie-Dye kit in Neon
– 24 gauge wire
– Scissors
– Wire cutters

Cut long strips from the bottom of the shirt.  It will end up being in a loop, so you will want to cut the loop.

Using the pom pom tool, start wrapping the strips around pulling them as you go. This w ill make for a longer strip (one time when it's ok to pull your t-shirt).

When you finish with one strip, add another, then another, and another.  You want to make one big bulky wrap around the pom pom maker.


Use wire cutters to cut off a 5 inch piece of wire and wrap around the center tightly.

Cut the sides and let it fringe out until the pom pom is not attached to the pom pom maker.
 Fringe out your pom pom even more, use the scissors to trim the pom pom. Now cut off the excess wire.
And there you go!  Look how pretty these little pom poms turned out!

We can't wait to show you the finished cake in all it's glory.  It's tie-dyerrific!

Thursday, June 6, 2013

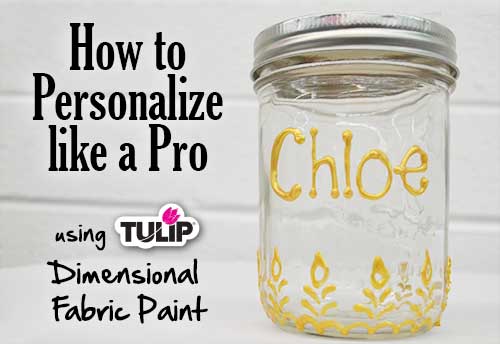
How to do personalized letter like a pro


Have you ever personalized with dimensional paint?  It's perfect for a special gift for a friend or a custom t-shirt!  Below you'll find an awesome guide that will help you when you want to create great 3-D lettering on your project!  We pulled it out of our archives and thought it would be great to share with you! 

Have you ever done "Puffy Paint" lettering before? Do you do it with the little dots like we did above?